
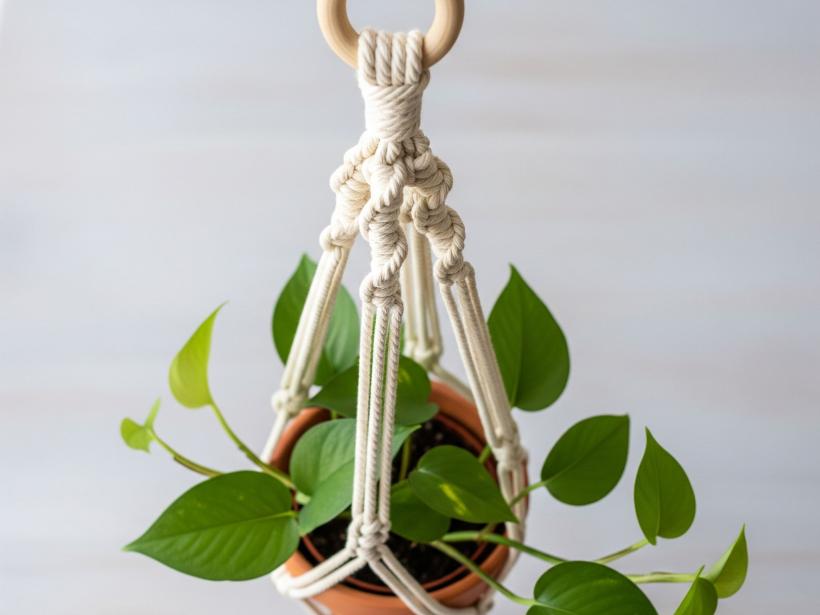

Let’s be honest – plants in a room? Great. But plants hanging in a hand-knotted macrame plant holder you made yourself as a DIY project? That’s the kind of thing that makes a space feel lived-in. Not forced. Not fake. Just right.
Macrame isn’t some lost vintage craft anymore. It’s had a glow-up, slipped into the Pinterest boards of every design-lover alive, and now it’s all over windows, walls, and cozy corners. A simple macrame plant hanger is one of the easiest ways to bring that look home. No fancy tools. No art degree. Just some rope, a free afternoon, and a little patience with knots.
Why These Hangers Work So Well
There’s something about them – hanging softly in a beam of sunlight, holding a leafy pothos or trailing ivy – that turns a dull corner into something soft and inviting.
They’re more than just practical. They’re kind of magic.
Here’s what makes them click:
- Space-saving; great when floor space is tight or nonexistent
- Customizable; go rustic or modern without needing to buy anything new
- Visually interesting; they add height, texture, and movement to a room
You hang one up and suddenly your room has depth. Some movement. A little soul.
What You’ll Need (Nothing Fancy)
You probably already have half this stuff lying around. If not, any craft shop or quick online order will do.
- Cotton macrame cord – 3–4 mm is ideal
- A ring – wood or metal, whichever you like the look of
- Scissors (sharp ones)
- A tape measure
- A plant pot you like looking at
Optional: beads, wooden accents, or anything else you want to add for flair.
Making It: The Easy Way That Doesn’t Look Easy
Here’s where we get into it. Don’t let the word “macrame” scare you off – this is basically knot-tying with better PR.
- Cut four cords, each one about 3.5 to 4 meters. Fold them in half and pull the looped ends through the ring. Now, pull the other ends through the loop to lock them in place. You’ll have eight cords hanging down.
- Divide them into four pairs. About 30 cm from the top, tie a square knot in each pair. Try to keep them even; uneven cords are fine for messy buns, not so much here.
- Make the net. Go 15 cm down, take one strand from one pair and one from the next. Tie them together. Repeat this all the way around.
- Close it up. Gather all the cords and tie a big ol’ knot at the bottom to hold your pot in place. Trim the ends however you like – straight, tapered, wild.
And you’re done.
Now Make It Yours
You could stop there, but if you’ve got the itch to keep going? Lean into it. There’s no wrong way to style a DIY macrame plant hanger.
Want it to feel more modern? Try black cord and metal rings. Want it earthy and soft? Stick to neutrals and wooden accents. Or toss in a bead or two for a boho touch.
Try these quick upgrades:
- Add beads between knots
- Mix colors in your cords for subtle texture
- Double up and make a two-tier hanger for more plants
Everything looks more impressive when it hangs from the ceiling, I swear.
Final Words? You Got This.
Look, I’ve made a hundred of these. Some were lopsided. Some took hours. Some came together in twenty minutes while watching reruns. It doesn’t have to be perfect. The beauty of a macrame hanging planter is in the doing. It’s in the rough edges, the pulled knots, the part where your fingers get tired but you keep going.
So hang up that easy macrame plant hanger, step back, and admire the vibe shift. You just made art. For your plants. From scratch.
And yeah, it looks amazing.