
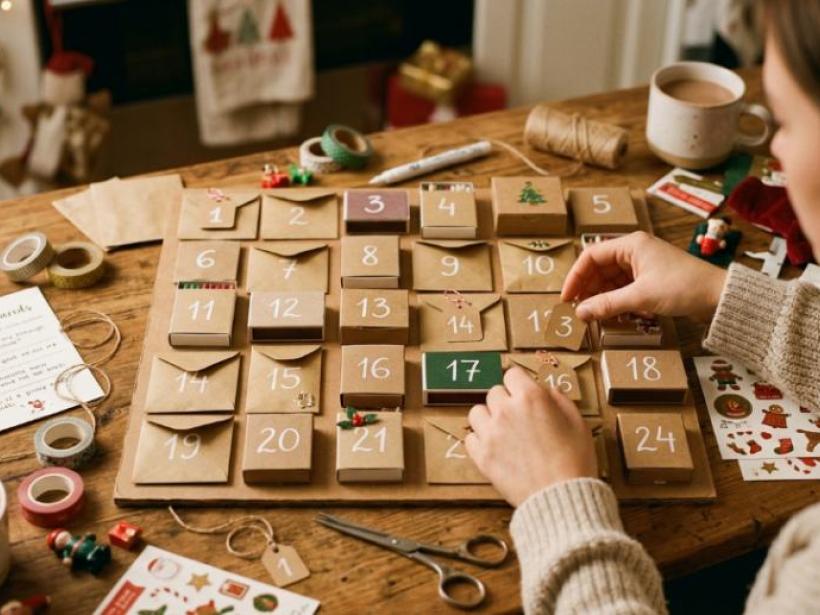

Ever opened a store-bought advent calendar and found the same waxy chocolate behind every single slot? That's the whole reason people start making their own. A DIY advent calendar gives you 24 days you actually control, not 24 days of the same mystery chocolate square.
A DIY advent calendar is a homemade countdown to Christmas. It has 24 slots, one for each day from December 1 to 24, and you decide what goes inside each one. Most versions come together in under an hour using stuff you probably already have at home, like paper bags, matchboxes, or wooden pegs. If you're into repurposing ordinary objects for projects like this, you've probably got most of what you need already.
This guide covers the easiest ways to build one, what to put inside, and a few mistakes worth dodging before December rolls around.
Why Bother Making Your Own?
A store-bought calendar locks you into whatever the brand decided to pack. A homemade one doesn't. You pick the size, the cost, and what's actually inside each slot.
A 2026 DIY version made from paper bags and small treats usually costs $10 to $15 for all 24 days. A name-brand chocolate calendar from the supermarket often runs $20 to $35, and honestly, nobody remembers the chocolate a year later.
What Should You Build It From?
Small paper bags, matchboxes, egg cartons, and wooden pegs are the go-to choices. They're cheap, easy to number, and sturdy enough to hold small items without falling apart.
- Paper bags. Fold the top down and clip it with a peg. Works well for bulkier treats.
- Matchboxes. Good for tiny items like jewelry, candy, or a folded note.
- Egg cartons. Two cartons of 12 already give you 24 slots, no cutting required.
- Mini envelopes. Flat and great for notes, vouchers, or little activity prompts. If folding is more your thing, the same paper-folding skills used for a simple chatterbox work well here too.
How Do You Number 24 Slots?
Skip the pre-made stickers. Just hand-write numbers 1 through 24 on small tags or cut pieces of card using a marker or paint pen. It costs nothing extra and takes maybe ten minutes.
Want it to look a bit more polished? Use a simple stencil and one paint colour across all 24 tags. It barely adds time but makes the whole set look like it matches.
What Goes Inside Each Slot?
Candy isn't the only option, and honestly it shouldn't be the only one. Mixing things up keeps the countdown fun for kids and adults alike.
|
Slot Type |
Example Fill |
|
Treat |
Small chocolate, candy cane piece |
|
Activity |
"Watch a Christmas movie tonight" |
|
Craft |
Mini ornament to decorate |
|
Note |
A joke, riddle, or kind message |
|
Outdoor |
"Look for 3 Christmas lights on your street" |
Try mixing in 8 to 10 non-candy days out of the 24. By mid-month, an all-candy calendar starts to feel less like a treat and more like a sugar obligation.
Is DIY Actually Cheaper?
Usually, yes. A DIY calendar built from paper bags and dollar-store fillers typically lands at $10 to $15 total. A packaged version with similar contents runs $20 to $35.
The catch is time. Building 24 slots takes roughly 45 minutes to an hour, plus however long it takes to fill them. A store-bought calendar, by comparison, is ready the second you open the box.
Mistakes Worth Avoiding
A few problems show up again and again on first attempts:
- Slots too small for the filler. Measure your biggest item before picking matchboxes or envelopes.
- Numbers that smudge or fall off. A paint pen holds up better than a regular marker, especially on glossy paper.
- A base that won't stay put. Twenty-four freestanding paper bags in a row will topple. Mount them on a board or string them along twine instead.
One Family's Version
A family of four put together a 24-slot calendar from egg cartons and washi tape in 2026. It took under an hour to assemble and cost around $12 in fillers. Their 7-year-old asked to help write the daily activity notes, and that part, not the candy, turned into the actual tradition. By the second week of December, the activity slots were the ones the kids opened first. The finished calendar ended up displayed the same way they'd decorate the kids' walls the rest of the year, propped up where everyone could see it.
The Bottom Line
You don't need special tools or a big budget for this. Paper bags, matchboxes, or egg cartons all work fine as a base. Mix treats with activities and notes, and each day stays worth opening. Build the structure once, in under an hour, and reuse it next December with fresh fillers, the same way you'd hang onto a piece of DIY wall art you actually like.