
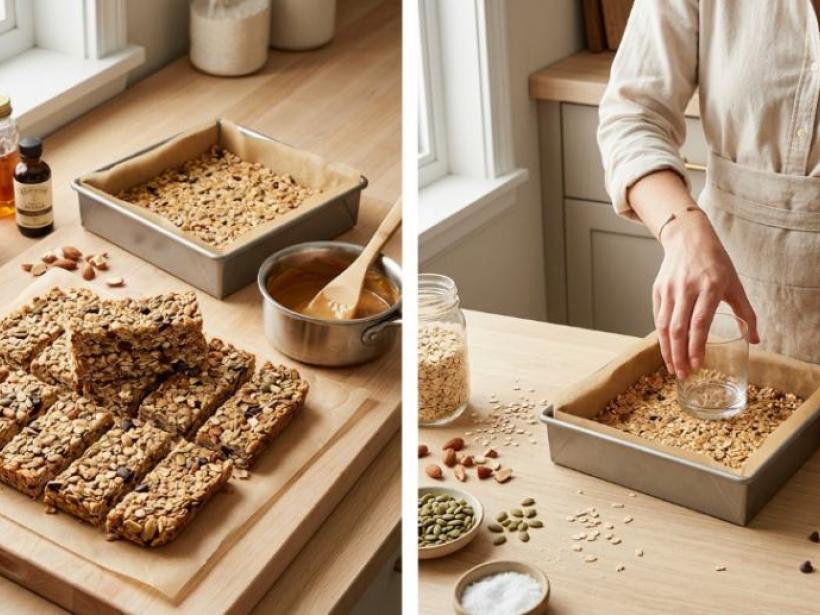

Homemade granola bars are oat-based snack bars sweetened with honey or maple syrup and held together with nut butter instead of refined sugar and oil. You can make a batch in under 30 minutes with nothing more than a saucepan and a baking tin, and you decide exactly how sweet, chewy or chocolatey they come out.
The appeal isn't really about cutting kilojoules – it's about knowing what's actually in the bar. Most shop-bought versions list two or three sugars before you even get to the oats. Here you get one sweetener, in an amount you control.
What Makes a Granola Bar Actually Healthy?
A granola bar earns the "healthy" label when whole grains and natural fats do the work of holding it together, rather than refined sugar and vegetable-oil blends doing the work of holding it together. Packaged bars often list two or three types of sugar among their first five ingredients. That's closer to a chocolate bar's sugar profile than most people expect from something marketed as a health snack. The same question comes up with healthy crock pot meals – "healthy" on a label doesn't tell you much until you check what's actually doing the work in the recipe.
Worth saying plainly: honey isn't a free pass just because it's natural. The World Health Organization recommends keeping free sugars – honey included – under 10% of total dietary energy, and Australia's NHMRC guidelines make a similar point about added sugars generally. Homemade doesn't mean unlimited. It just means you're the one deciding how much goes in, and you can trim it back once you know the mixture still holds.
Ingredients You Need
This recipe makes 12 bars from pantry staples:
- 2 cups (200g) rolled oats
- 1/2 cup (125g) peanut butter or almond butter
- 1/3 cup (115g) honey (or maple syrup for a vegan version)
- 1/4 cup (35g) chopped nuts (almonds, walnuts or pepitas)
- 1 tsp vanilla extract
- Pinch of sea salt
- Optional mix-ins: dried fruit, chia seeds, mini dark chocolate chips
Stick with old-fashioned rolled oats rather than quick oats. Quick oats break down too far and the bars end up dense instead of chewy.
How Do You Make Granola Bars That Actually Stick Together?
Two things determine whether these hold together: enough sticky binder relative to the oats, and firm pressure into the tin before they set. If a batch crumbles, the fix is almost always more nut butter or honey, not more oats.
Warming the honey and nut butter first matters more than it sounds like it should. Cold, thick nut butter coats the oats unevenly, so parts of the bar end up drier than others. Warm it until it's runny and it spreads through the whole mixture instead of clumping. The same binder-to-oats logic applies in our guide to oatmeal cookies that hold together, if you want the same fix for a different bake.
Step-by-Step Method
- Toast the oats and nuts (optional). Spread them on a baking tray and toast at 180°C for 8–10 minutes until lightly golden. Skip this if you're short on time; it adds flavour but nothing structural.
- Warm the wet ingredients. In a saucepan over low heat, warm the nut butter and honey together until smooth and runny.
- Combine. Pour the warm mixture over the oats and nuts, add the vanilla and salt, and stir until every oat is coated.
- Press into a tin. Line a 20cm x 20cm tin with baking paper. Press the mixture in hard – a flat-bottomed glass does this better than a spoon.
- Chill. Fridge for at least an hour, or freezer for 20–30 minutes, until firm.
- Slice and store. Cut into 12 bars.
Can You Make Healthy Granola Bars Without Baking?
You can, and toasting is genuinely the only step that involves heat at all. Warm the nut butter and honey, stir through raw oats, press into the tin, and chill. The bars come out a touch softer without that toasted crunch, but they still hold their shape fine.
Chocolate Granola Bar Variation
Stir 2–3 tablespoons of cocoa powder into the warm honey and nut butter before adding the oats. Let the mixture cool slightly before folding through mini dark chocolate chips, otherwise they'll melt away instead of staying as chips. If you want something a bit more indulgent, drizzle melted dark chocolate over the top before it goes in the fridge.
How Many Kilojoules Are in a Homemade Granola Bar?
Roughly the same as a store-bought bar the same size. Nut butter, oats and honey are all energy-dense, so making your own doesn't shrink the kilojoule count. What changes is what comes along with those kilojoules: fibre and protein here, versus refined sugar and stabilisers in most packaged versions. If kilojoules matter more to you than sugar sources, cutting a smaller bar does more than reworking the recipe.
Storage: How Long Do Homemade Granola Bars Last?
A week in the fridge in an airtight container. For anything longer, wrap the bars individually and freeze them for up to two months – they thaw in about 15 minutes at room temperature, which is enough time to pack a lunchbox around them.
Frequently Asked Questions
Do I need to bake granola bars for them to hold together?
No. A no-bake version set in the fridge or freezer holds just as well as a baked one, provided the honey-to-oats ratio is right. Baking mainly changes the texture, not the structure.
Can I make these gluten-free?
Use certified gluten-free rolled oats. Standard oats are sometimes processed in facilities that also handle wheat, so cross-contact is the issue, not the oats themselves.
What can I use instead of honey?
Maple syrup works, and makes the recipe vegan. Brown rice syrup is stickier and binds slightly better if you're worried about the bars holding together.
Why did my granola bars fall apart?
Almost always not enough binder, or not enough pressure when pressing the mixture into the tin. Add a tablespoon more nut butter or honey and press harder next time round.
Are homemade granola bars actually healthier than store-bought ones?
Usually, yes – mainly because you skip the added sugars and preservatives most packaged bars carry, and you control exactly how much sweetener goes in.
The base ratio here is the whole trick. Get that right and the rest – no-bake or baked, plain or chocolate, nut butter or seed butter – is just variation on the same idea.
Make one batch, then start adjusting it to what you actually like. Browse our full Recipes section for more easy, honest snack and meal ideas once you've got the base down.